On this page
View In PDFAn overlay adds thickness to existing stair treads. Unless the adjoining floors and steps are considered together, that can change the first or last rise and make the spacing uneven. Have the contractor measure the complete flight and its landings before choosing the new finish, so the renovation does not introduce an unexpected step height.
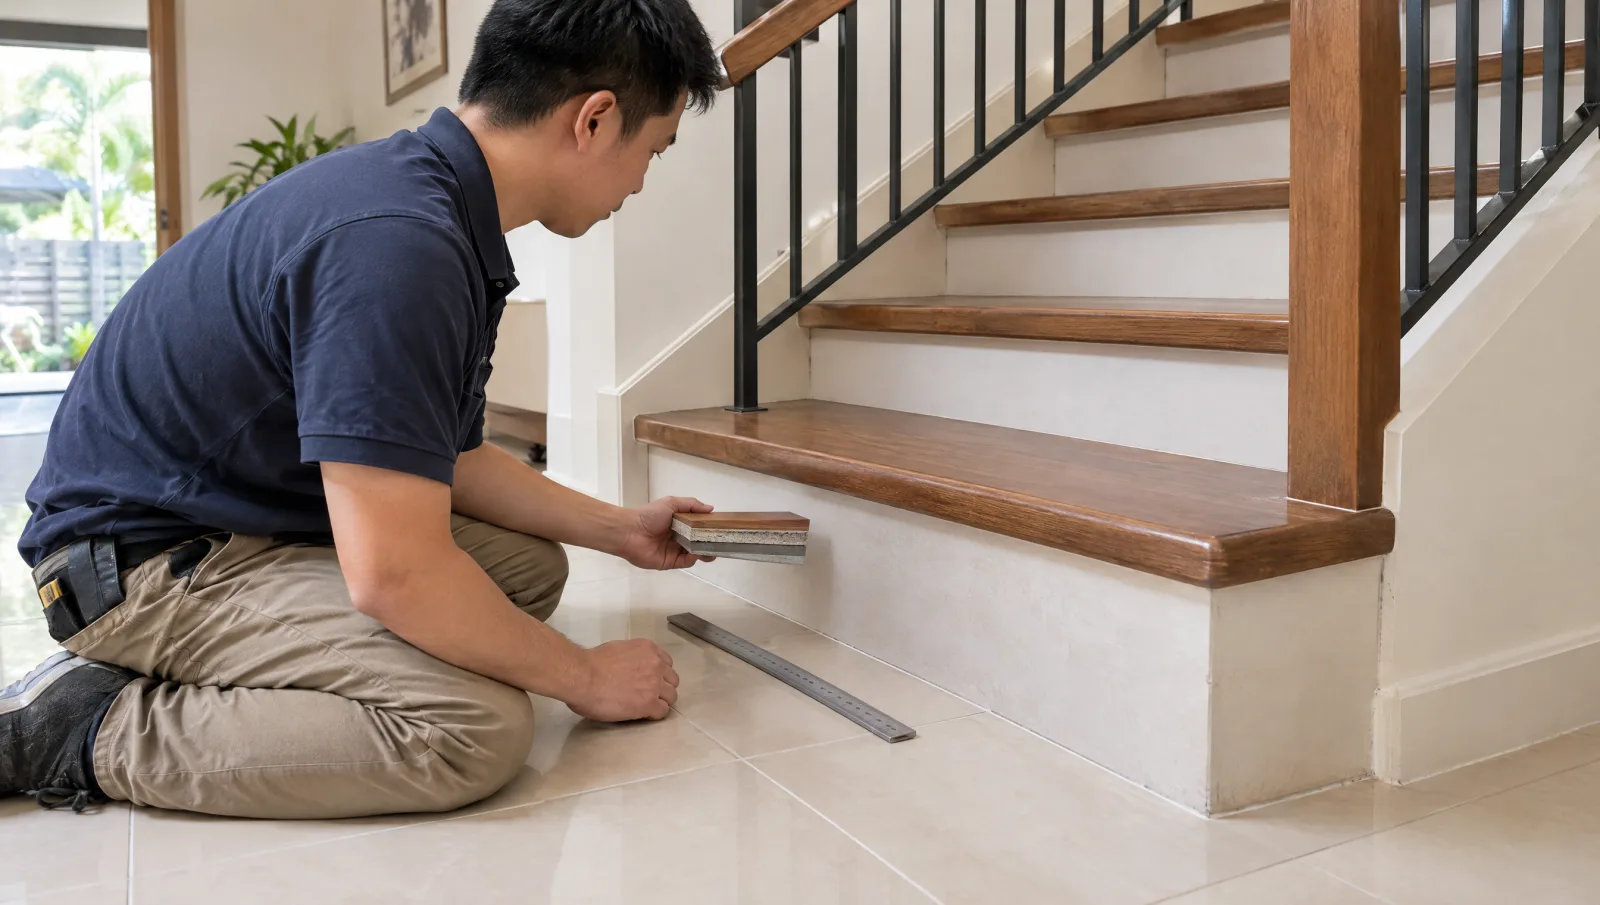
That is why a staircase renovation involving an overlay needs more than a finish sample. Ask for a side-on drawing showing the lower floor, every step and the upper landing. It should include the thickness of the adhesive, any levelling material and the new finish, so the final step heights can be checked.
Follow the new layer from the bottom to the top
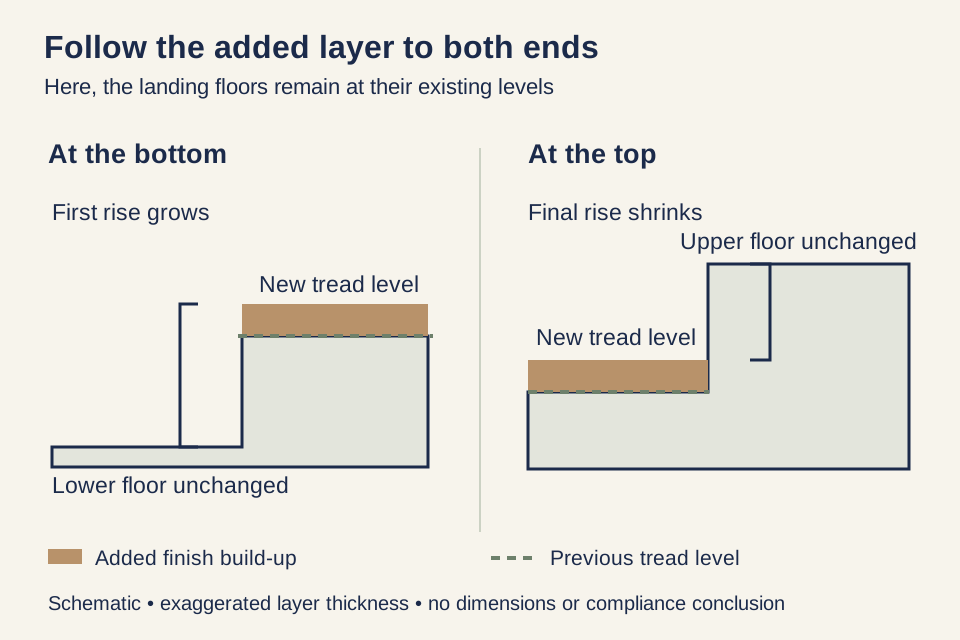
Imagine the lower floor is retained and a new finish is laid over the first tread. The floor where your foot starts has not moved; the surface where it lands is now higher. The difference between those two surfaces increases. This is a geometric consequence of the added layer, independent of whether the finish is timber, stone or another suitable material.
If the next tread receives exactly the same total build-up, both its starting and arrival surfaces move up together. The rise between those two finished treads can remain the same. That simple relationship is why looking only at a run of middle steps can miss the effect at the ends. Real stairs still need to be measured: existing variation, preparation and different details can change the result.
At the top, the situation reverses. The last tread before the landing has moved upward, but the retained upper floor has not. The rise from that tread to the upper floor becomes smaller. Altering the upper floor finish changes the calculation again. Neither end can be settled from the tread sample alone.
The diagram isolates this one change so that its effect is visible. It does not propose a compliant finished stair or show a recommended thickness. If the lower and upper floors are also being renovated, place their complete build-ups on the same drawing. “New flooring throughout” is too vague when different trades may be preparing and finishing the stair and each landing.
The surface you step on is the measurement that matters
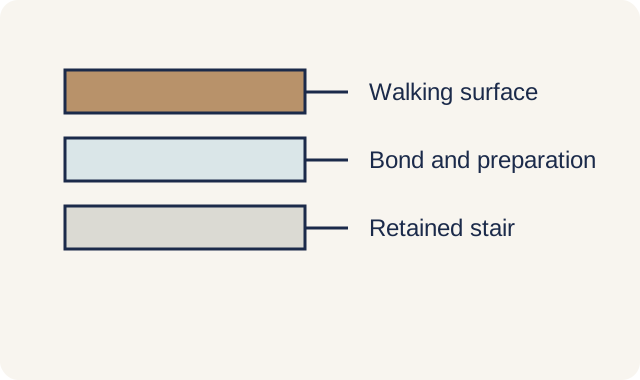
A dimension to bare concrete or unfinished timber does not describe the final foot placement. Adhesive, levelling material, underlayers and the finish itself may contribute to the completed build-up. The contractor and designer should confirm the total thickness of all the layers rather than treating the decorative layer as the whole thickness.
Assess the stair’s finished riser and tread geometry, including the tread nosings. Incomplete finishes can prevent accurate measurement. Review the completed arrangement with the project team, rather than measuring an unfinished stair against an isolated number found online.
That distinction matters when the work changes during installation. A different edge profile, additional substrate preparation or a substituted flooring product can alter a detail that was previously coordinated. If the build-up changes, the side-on detail and the connections to the landing floors need to be rechecked before the new detail is repeated across the flight.
Look horizontally at the edge as well as vertically at the rise
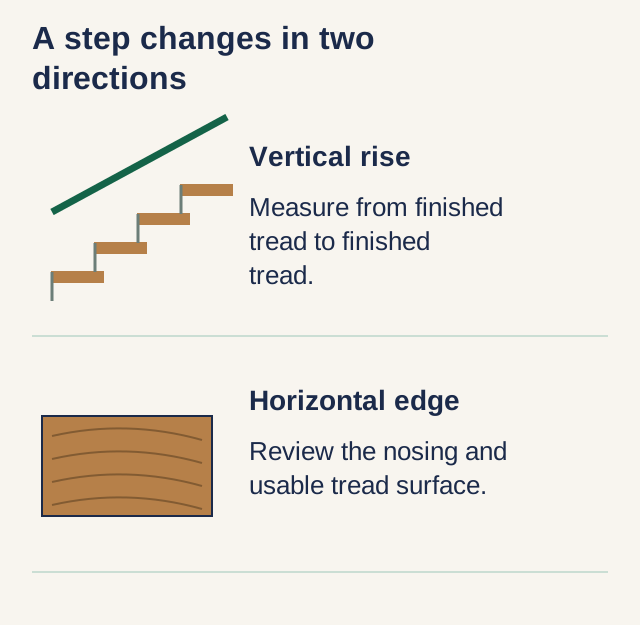
A tread is also a place to put a foot. The front edge, or nosing, influences the usable surface and the relationship with the riser beneath it. Covering an existing projecting edge with a new profile can create a different shape from removing or adapting that edge under an approved method. Those approaches should not disappear into the same vague line item for an overlay.
The proposed detail should show the front edge in section, including how the finish returns or meets the riser. A photograph from above can hide a bulky lip or a join just below it. Look at the side view and at an actual sample of the finished step edge where one is useful, especially if the staircase will be a prominent part of the entrance hall.
The sides need attention too. New surface levels meet skirtings, stringers and balustrade bases. A previously neat junction can become a narrow exposed strip, while a new trim can change the intended appearance. More consequential connections, including guarding fixings and any changes that affect protective barriers, need the project team’s assessment. Decorative cover pieces are not a substitute for that coordination.
| Junction | What belongs on the coordinated detail | What the finish sample cannot establish |
|---|---|---|
| Lower floor to first tread | Complete lower-floor and first-tread levels | The finished first rise |
| Last tread to upper landing | Complete final-tread and upper-floor levels | The finished final rise |
| Tread front to riser | Nosing profile, return and connection to the riser | The completed foot-placement geometry |
| Tread side to guarding or trim | Retained and new interfaces, including relevant fixings | Suitability of connections or protective barriers |
Coordinate the staircase with the floor at each landing
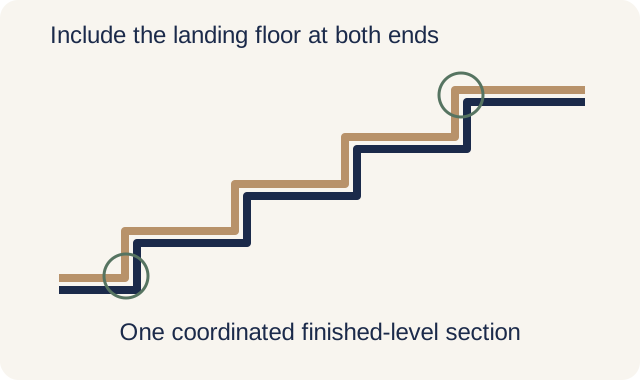
Overlay problems are easier to prevent when one coordinated drawing governs the related trades. The stair installer may know the tread finish, while another contractor supplies the upper-floor flooring. If each works only to their own product thickness, neither quotation necessarily includes resolving the final relationship between them.
Make the proposal identify who confirms the existing levels, who prepares the substrate and who coordinates the finished stair with the landing floors. That does not require the homeowner to design the stair detail. It makes the professional and contractor responsibilities visible before the work reaches the point where an awkward junction is expensive to change.
The sequence matters. A floor finish selected late can affect a staircase detail already fabricated. An overlay ordered before the retained stair is assessed can assume a substrate condition that is not present. Confirm the essential dimensions and the suitability of the retained construction at the stages required by the project team, and allow for any necessary revision before production.
An overlay is not a cure for every stair problem
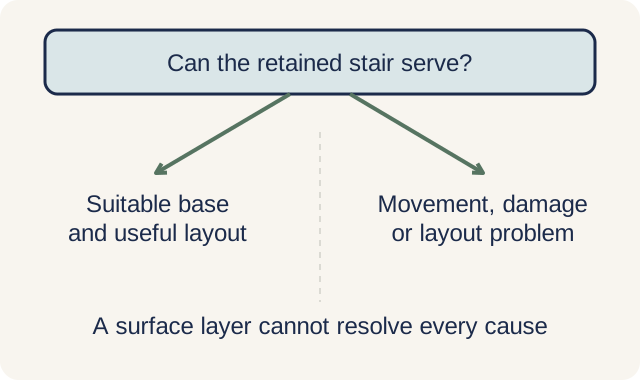
An overlay can be a coherent finish strategy when the retained stair is suitable and its completed geometry works. It should not be used to avoid investigating movement, damaged material or an unsatisfactory layout. A surface layer can change what is visible while leaving the reason for the renovation unresolved.
It also deserves comparison with refinishing suitable existing material or selectively replacing components. Those alternatives may retain a useful edge detail or avoid adding an unwanted layer. They have their own preparation, condition and disruption requirements, so compare the complete scope rather than the label. Our restore-or-replace decision guide works through that wider choice.
Regulatory requirements need to be scoped to the property and works. For some stair provisions, specific exemptions apply to houses built by owners for their own use. Those exceptions are not a blanket approval for an overlay or evidence that an inconsistent stair will be comfortable. Ask the appointed professional to confirm the applicable requirements alongside the needs of the people using the house.
Agree the finished step heights and edges before approving the finish
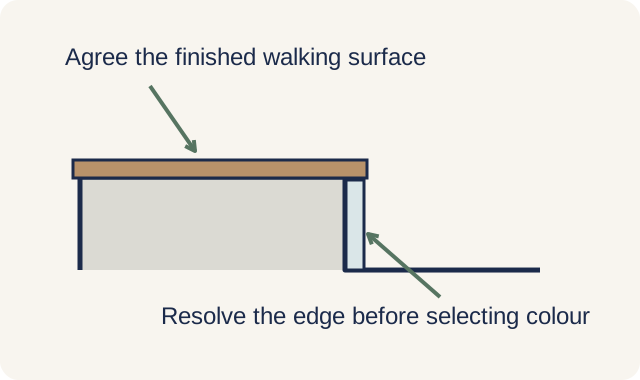
Ask for a side-view drawing through the lower floor, the steps and the upper landing, with the proposed finish and layers beneath it included. The drawing should also show the front edge of each tread and how adjoining parts meet. Use the sample to choose the appearance after those dimensions are resolved. If the proposed layers change on site, have the team explain the effect on the finished steps before proceeding.
Use the staircase renovation buying guide for the broader scope and contractor discussion. For an overlay specifically, bring the landing-floor plans into that discussion early. The first and last step belong to the staircase and the rooms it connects; a good detail considers both.
Staircase Renovation across Singapore
Need help with your project?
Tell us what you need on WhatsApp and send a few photos. We'll arrange a free site assessment, then give you a fixed-price quote within 3 to 5 working days.