On this page
View In PDFFor a bathroom or toilet floor, the choice comes down to movement. A rigid coating, such as a cement-based slurry, suits sound concrete that won’t move. A flexible liquid membrane copes better with slight movement, including cracks that open and close. Either can leak at corners, pipes and the drain unless it runs unbroken there and is tested before tiling.
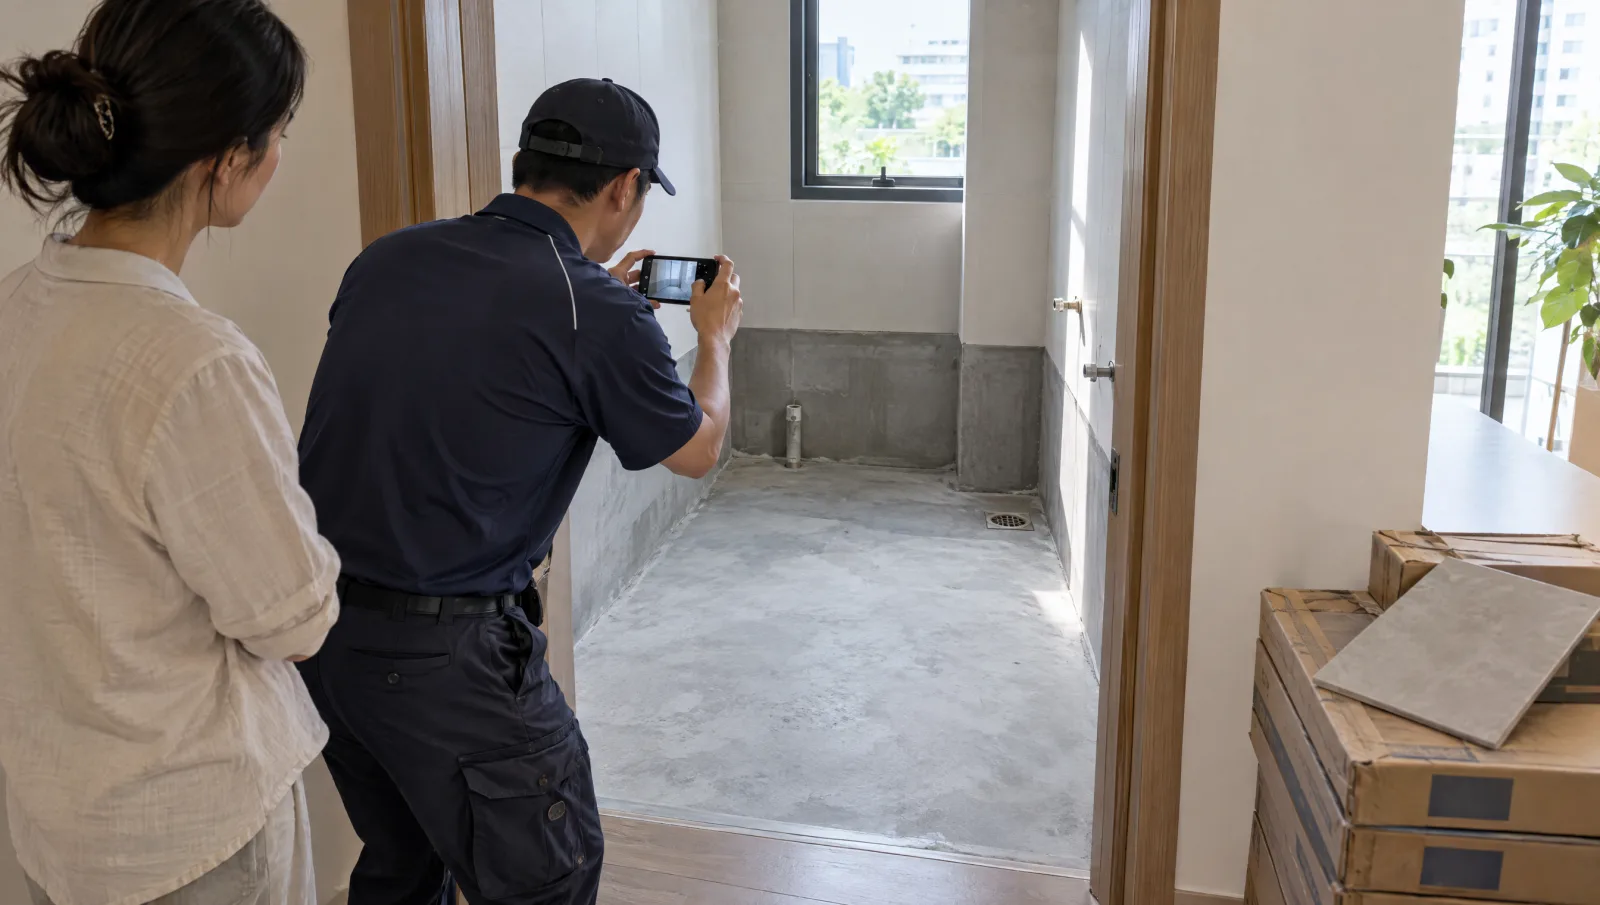
When an upstairs bathroom leaks, the problem can spread beyond the bathroom itself: a stained ceiling, peeling paint or dampness in the room underneath. Repairing the concealed waterproofing may then mean removing tiles and putting the bathroom out of use again. That is why the waterproofing scope deserves attention early in a landed bathroom renovation, while the floor and its connections are still accessible.
Bathroom waterproofing is the concealed layer that prevents shower and washing water from reaching the structure and adjoining rooms. Choosing the material is one decision; making that layer work around corners, outlets and later fittings is another. Both need to be resolved before the finishes hide them.
Why tiles and grout are not enough
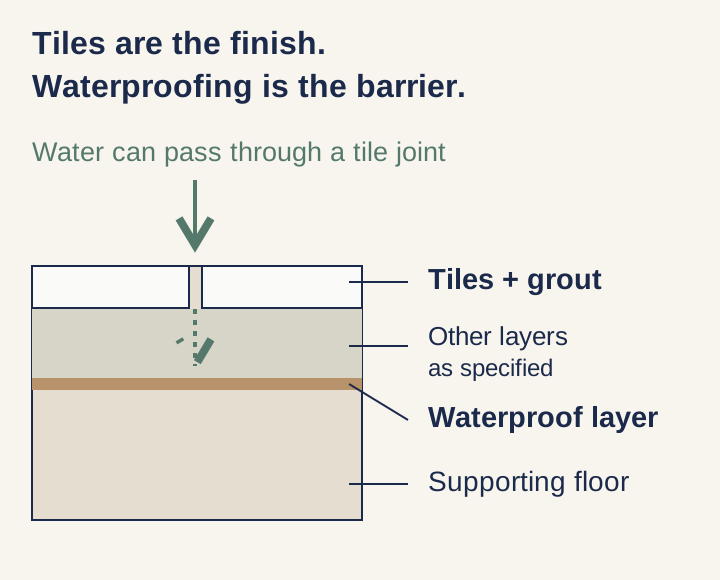
Tiles provide a durable, washable surface. They do not form the complete waterproof barrier. Water can pass through a tiled finish even when the joints use impervious grout, so choosing an expensive tile or a different grout does not remove the need for waterproofing underneath.
The waterproofing membrane is the layer that blocks that route into the building. Think of the tiled finish and the waterproof layer as doing different jobs: one gives you a usable bathroom surface; the other keeps water within the protected area. Replacing the visible finish alone cannot establish that the hidden layer is sound.
Drainage matters too. The finished floor needs to slope towards the outlet so water can drain away. Contractors call this slope the “fall”. A floor that leaves puddles needs its levels and drainage checked; adding waterproofing will not correct the tile slope. Plan both parts together, particularly when changing the shower position, floor levels or drain.
On the walls, the membrane turns up from the floor at every corner and covers the shower walls where water hits them. How high it goes is set by the system and the bathroom design, so have the heights marked on the scope. Sika’s data for one of its cement-based coatings covers upturns of up to 300 mm and sends anything higher to its technical service team; that is one product’s limit, not a rule for every bathroom.
If you have been looking for a waterproofing paint, a liquid membrane is the kind that goes on like one. This maker’s liquid membrane is rolled or brushed on straight from the can, but unlike paint it must then be covered with render or screed before tiling. Moisture-resistant decorative paint is a wall finish; it is not evidence that the concealed waterproofing beneath a tiled shower has been provided.
A ceiling stain tells you there is a problem, not what caused it
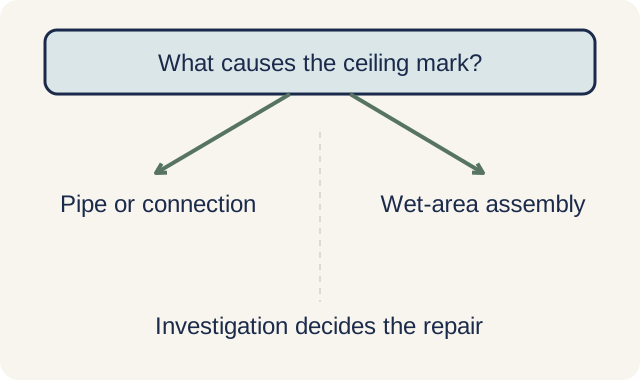
A damp patch below a bathroom can come from failed waterproofing, a pipe connection or another defect. HDB’s ceiling-leak guidance says repair recommendations depend on the leak’s severity and the flat owners’ needs, and some leaks require more than one method.
For example, repainting the ceiling will not stop an active leak above it. Regrouting may address a diagnosed problem at the tile joints, but it does not automatically repair a damaged membrane. Equally, a stain does not prove that the entire bathroom needs to be stripped. The proposed repair should explain where the water is entering and why that method will stop it.
If the bathroom already leaks, tell the contractor when the patch appears, what was in use beforehand and whether earlier repairs changed it. Our guide to a bathroom leak downstairs explains what to note before the visit. These observations help the investigation; they do not replace it.
Where a waterproof layer can fail
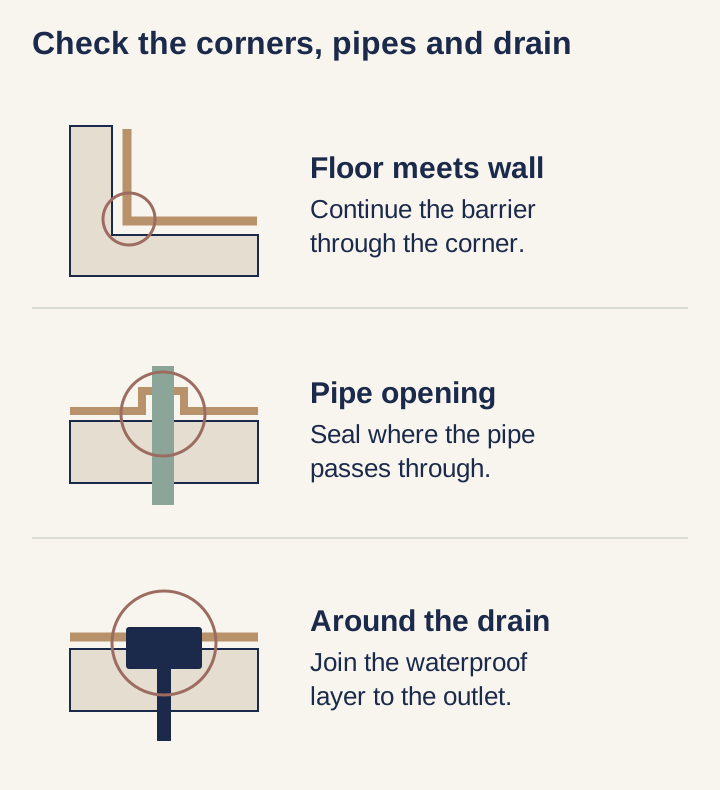
The waterproof layer needs to stay continuous where the floor meets a wall and where pipes or drains pass through it. If water can get through a gap at one of these connections, a sound coating across the middle of the floor will not stop that leak. Ask how the membrane will be joined and sealed at each connection using materials suitable for the chosen system and fitting.
The surface beneath the coating matters as much as the coating itself. For example, Sika’s concealed liquid membrane requires a sound, clean base without loose material or protrusions. Have the installer explain how cracks and unsuitable areas will be dealt with before the membrane is applied, rather than allowing a new coating to hide an unresolved defect.
A later trade can also damage completed waterproofing. Shower-screen fixings, plumbing alterations and other work that penetrates the protected area need to be coordinated with the installer. Include those details in the renovation plan so the team knows where fixings will go and how the waterproofing will be preserved.
What a proper waterproofing scope should include
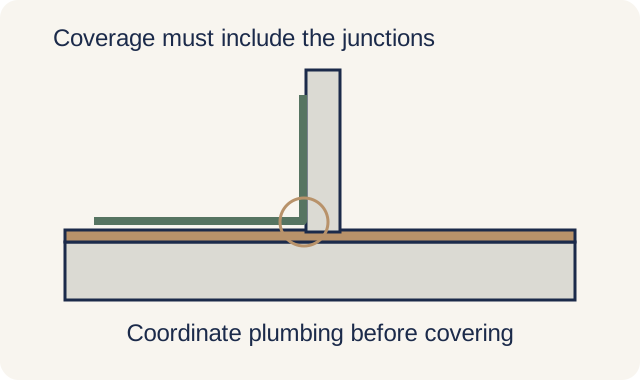
Start with the actual system to be installed and the areas it will cover. A quotation that says only “waterproofing included” leaves you unable to compare the work. The useful detail is which floor and wall areas are treated, how the drain and pipe openings are handled, what preparation is included and when the installation is checked.
Compare a proposed material with the actual floor and wall construction. A product intended for concrete cannot be assumed suitable for a different board, existing finish or moving joint. The installer should identify the complete build-up, including the membrane, corner and pipe details, protection layer where required, and the finish above it.
BCA’s 2018 Ceramic Tiling guide notes that cement-based waterproofing has been the type used most commonly in wet areas in recent years, and that it is easy to mix and apply. Common does not mean right for every floor, and two named products show why the material description needs to be precise. SikaTop Seal-107 (MY) is a two-part cementitious coating listed for rigid bathroom waterproofing; Sikalastic 668 Dampflex is a ready-to-use, polyurethane-modified concealed membrane for bathrooms before tiling. They are examples of different systems, not a recommendation that either fits every bathroom.
| Option to assess | What the maker says about this example | What needs checking for your bathroom |
|---|---|---|
| Cement-based coating | A liquid polymer mixed with a cement-based powder. Listed for rigid waterproofing of bathrooms and toilets, and for sealing fine hairline cracks in concrete not subject to movement. | The base and expected movement, detailing of joints, and compatibility with the materials above it. |
| Liquid membrane | Ready to use from the container and flexible enough for limited floor movement, bridging a 2 mm crack. It must be protected by screed or render. | The prepared surface, complete coating coverage, and the room allowed for its protection and final finish. |
So choose by the floor, not the brand. A sound concrete or rendered base that isn’t expected to move can take a rigid cement-based coating of the kind listed above; where the floor may move slightly, or has cracks that could open and close, a flexible membrane is the better fit. If a proposal relies on a coating across a joint that needs to move, settle the joint detail first, whichever coating is used. A brand name or a high coat count cannot compensate for a connection the design has left unresolved.
Treat a proposal to waterproof over existing tiles as a separate construction choice. The contractor needs to establish that the retained surface is suitable, that the selected system permits it, and that the drain, threshold and finished levels still work. If those answers are missing, “no hacking” describes the work avoided rather than the leak path repaired.
If stripping the old bathroom exposes damaged or unsuitable surfaces, agree the repair scope and any additional charge before the next layer is applied. You can then see what needs to be repaired and how it affects the schedule.
Plumbing needs to be coordinated at the same stage, especially around the drain and changed pipe routes. PUB requires Licensed Plumbers for regulated water-service and sanitary plumbing work, with an exception for its listed simple plumbing works. Have one named contact explain how the plumber and waterproofing installer will resolve the connections between their work.
What a ponding test can and cannot tell you
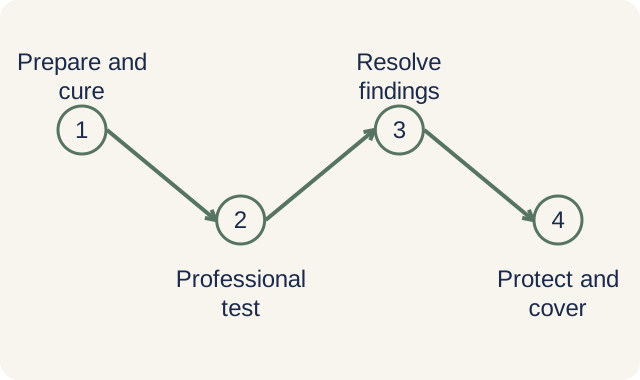
A ponding test holds water in a defined area while the contractor checks for leakage. Have the contractor arrange it under the selected system’s requirements; do not block drains or flood the bathroom yourself. The result is useful only when the tested area, readiness of the membrane and observations are clear.
Waiting between coats, readiness for a water test and readiness for covering are separate stages. For Sika’s Sikalastic 668 Dampflex, testing can begin 24 hours after the final coat. That is a product-specific point at which a test may start, not the length of the test or a promise that the bathroom will be finished then.
Have the contractor arrange the test and record the result, including the area, dates and observations. If it shows a leak, the defect needs repair and the affected work needs checking again before it is covered. A photograph of a wet floor alone cannot tell you how long it was tested or what was observed underneath.
A satisfactory test confirms the observed performance under those test conditions. It cannot guarantee that later drilling or construction damage will never create a leak. The next part of the schedule therefore matters: who protects the membrane, when it can be covered and how the remaining trades avoid damaging it.
Agree the pauses in the work before it starts. The first is after stripping and preparation, when the base and fittings can still be examined; the next is after the membrane and its details are complete; the last is before the finishes cover accepted work. The installer should identify who checks each stage and who authorises covering, so a tile delivery does not become the reason to skip a required check.
Compare the repair scope, testing and warranty behind the price
| Item to clarify | A useful answer includes | Pause if… |
|---|---|---|
| Preparation and coverage | Named system, treated floor and wall areas, and the preparation included. | The scope stops at “waterproofing included”. |
| Damage found after stripping | How additional repairs are assessed, explained and priced. | Extra work can proceed without your agreement to the added work and charge. |
| Testing | The test stage, procedure, recorded result and response to a leak. | Tiles will be laid before the agreed checks are complete. |
| Replacing removed finishes | Which tiles, fittings and affected finishes are removed and reinstated. | A low repair price leaves the bathroom finish or ceiling repair undefined. |
| Warranty and follow-up | Who handles a claim, covered work, exclusions and the remedy offered. | Only a warranty length is given, with no written terms. |
The cost question is larger than the price of the waterproofing material. Removing old finishes, repairing the base, coordinating plumbing, testing and reinstating tiles can all affect the amount you pay. In an existing leak repair, also clarify whether making good the affected ceiling or adjoining room is included.
A long warranty deserves a closer look at what happens if a leak develops. Does it cover the product, the installation or both? Who investigates, and does the remedy include access to the failed work and reinstating the finish? The answers matter more to your future bill than the number of years alone.
Look for a contractor who explains the cause or proposed construction, shows the areas included and allows time for checks before tiling. Be cautious when a proposal promises to solve every leak with one treatment, or moves straight to a cosmetic repair without explaining the source. These are reasons to seek a clearer proposal, rather than conclusions about a company’s reputation.
Keep a small, useful record of the work
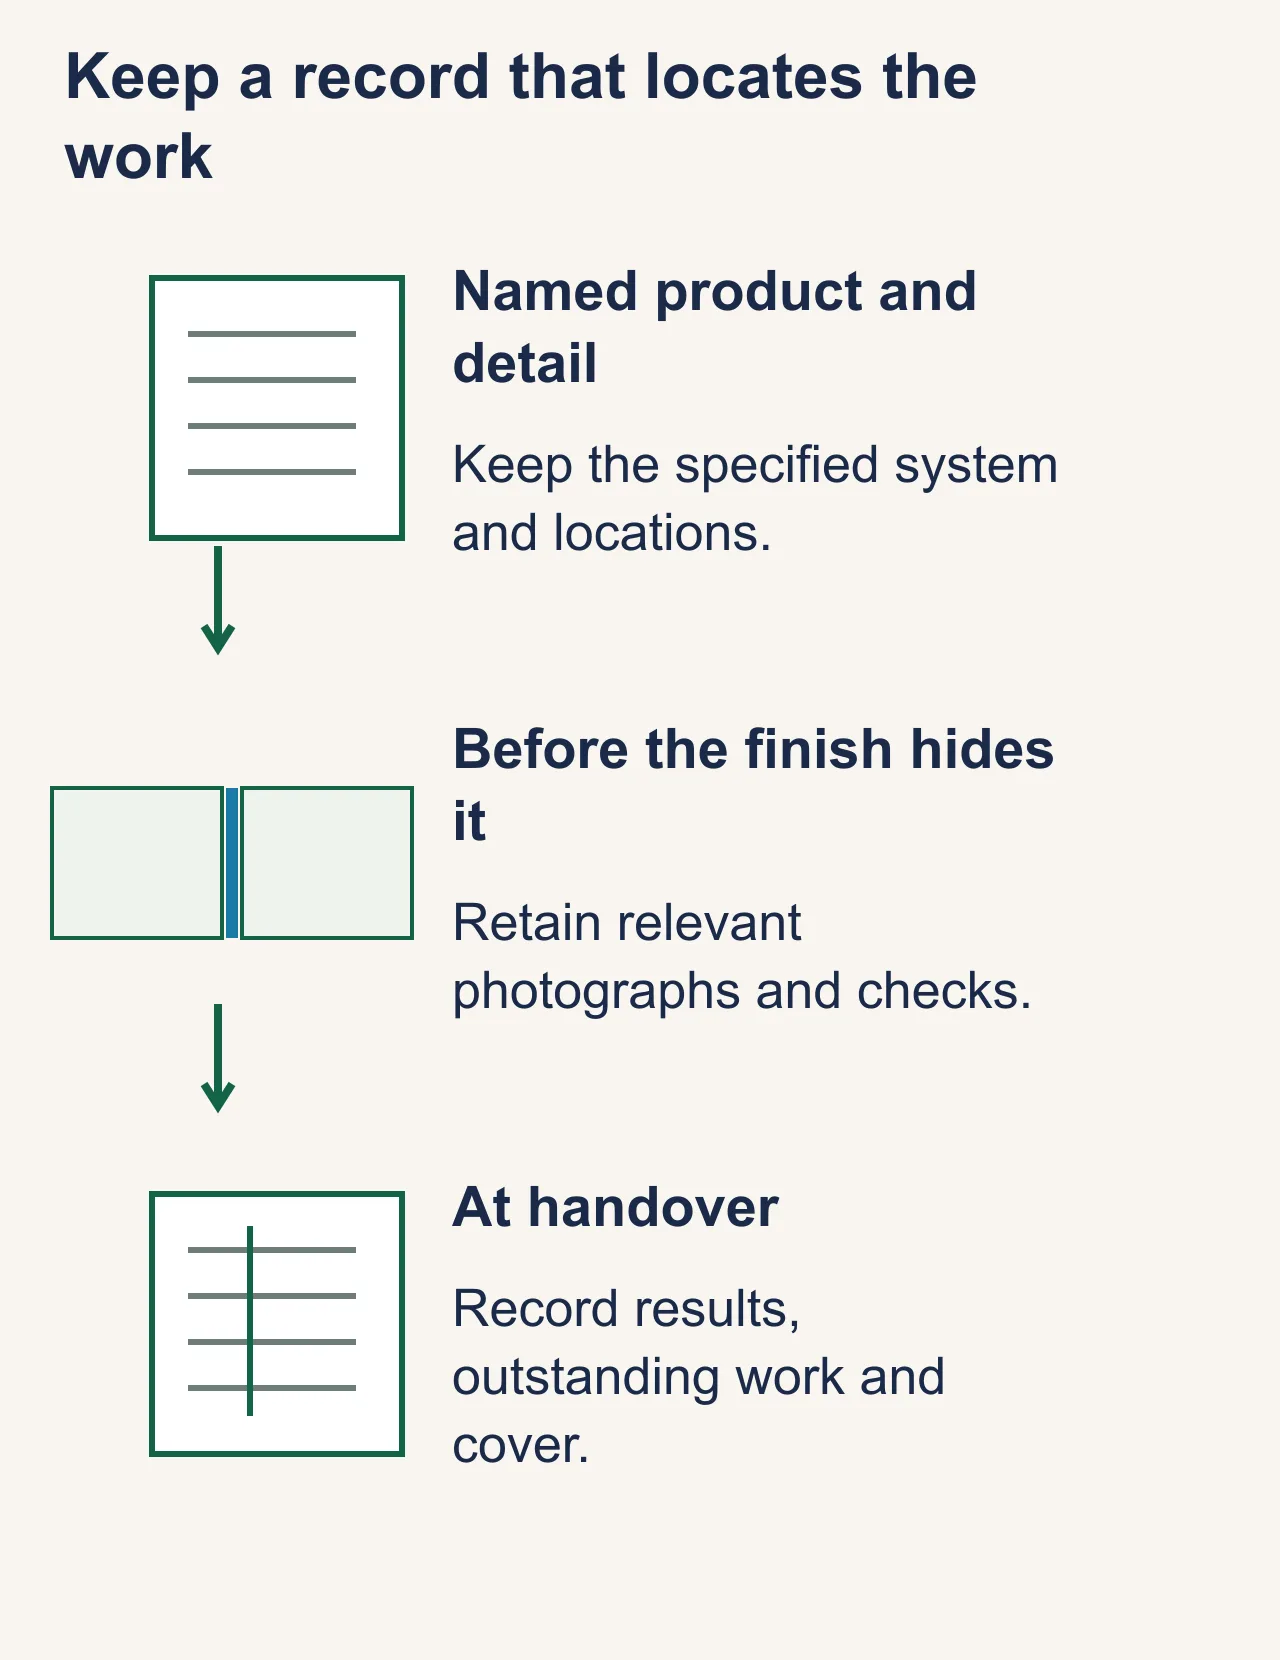
Before the tiles conceal it, retain dated photographs of the prepared floor and key connections, the product reference and the test result. At handover, add the warranty terms and the contact for a defect report. Those records help a future contractor understand what is beneath the tiles without relying entirely on guesswork.
Use the landed bathroom buying guide for the wider fixture and layout decisions, and the tile inspection guide if existing finishes are cracked or loose. When you are ready, send us the bathroom layout and any leak history. We visit to assess the bathroom free of charge and give a fixed-price quote within 3 to 5 working days of the visit, never from photos. Our specialist does the waterproofing, and we supervise it through to handover.
Common questions
How many coats of bathroom waterproofing are needed?
Use the selected product’s specification, including thickness and coverage, rather than a universal coat count. For the Dampflex example, Sika specifies at least two coats and says a third may be needed to obtain uniform coverage without pinholes. The installer must still achieve the specified finish and details; two thin or incomplete coats are not proof of an adequate membrane.
How long does bathroom waterproofing last?
Nobody can honestly give one number of years for every bathroom. The product, preparation, movement, detailing and damage from later work affect performance. Read the actual warranty for its covered work, exclusions and remedy; its stated period does not guarantee that every leak or the cost of removing tiles will be covered.
How can I check bathroom waterproofing before tiling?
Ask for the completed-system inspection and the contractor’s test record before the work is covered. The record should identify the tested area, when the test ran, what was observed and any repair and retest. Photographs help locate concealed work, but a picture of a wet floor alone does not establish a satisfactory test.
How long does bathroom waterproofing take to dry?
For Sika’s liquid membrane example, the maker gives under an hour to touch-dry in lab conditions, 1 to 2 hours before the second coat depending on temperature and humidity, and about 4 hours to dry after it; a ponding test can start 24 hours after the final coat. For its cement-based example, the maker gives 4 to 8 hours between coats at 30°C, and at least 3 days before another cement-based layer goes over it. Touch-dry, ready for another coat, ready for testing and ready for covering are different milestones. Ask the installer to put those stages in the work sequence using that product’s instructions; do not treat a drying figure as the completion time for the bathroom.
How is bathroom waterproofing applied?
In a full redo, the old finishes and any loose material come off, and cracks and weak areas are dealt with. The floor’s fall to the drain is checked, and the corners, pipe openings and floor trap are sealed first. The membrane then goes on in the coats the product specifies, across the floor and up the walls, and is left to cure before a ponding test. Once it passes, it is protected with screed or render where the system calls for it, and the tiles go on. The exact method follows the chosen system and the bathroom design. Sika’s liquid membrane, for example, needs new concrete cured for at least 28 days and new render for at least 7 days before it goes on, with the first coat at least 0.4 mm thick when wet and at least two coats in all. Leave the application and water testing to the contractor rather than following a generic DIY recipe.
Need help with your project?
Tell us what you need on WhatsApp and send a few photos. We'll arrange a free site assessment, then give you a fixed-price quote within 3 to 5 working days.